最小安装(性能优先)

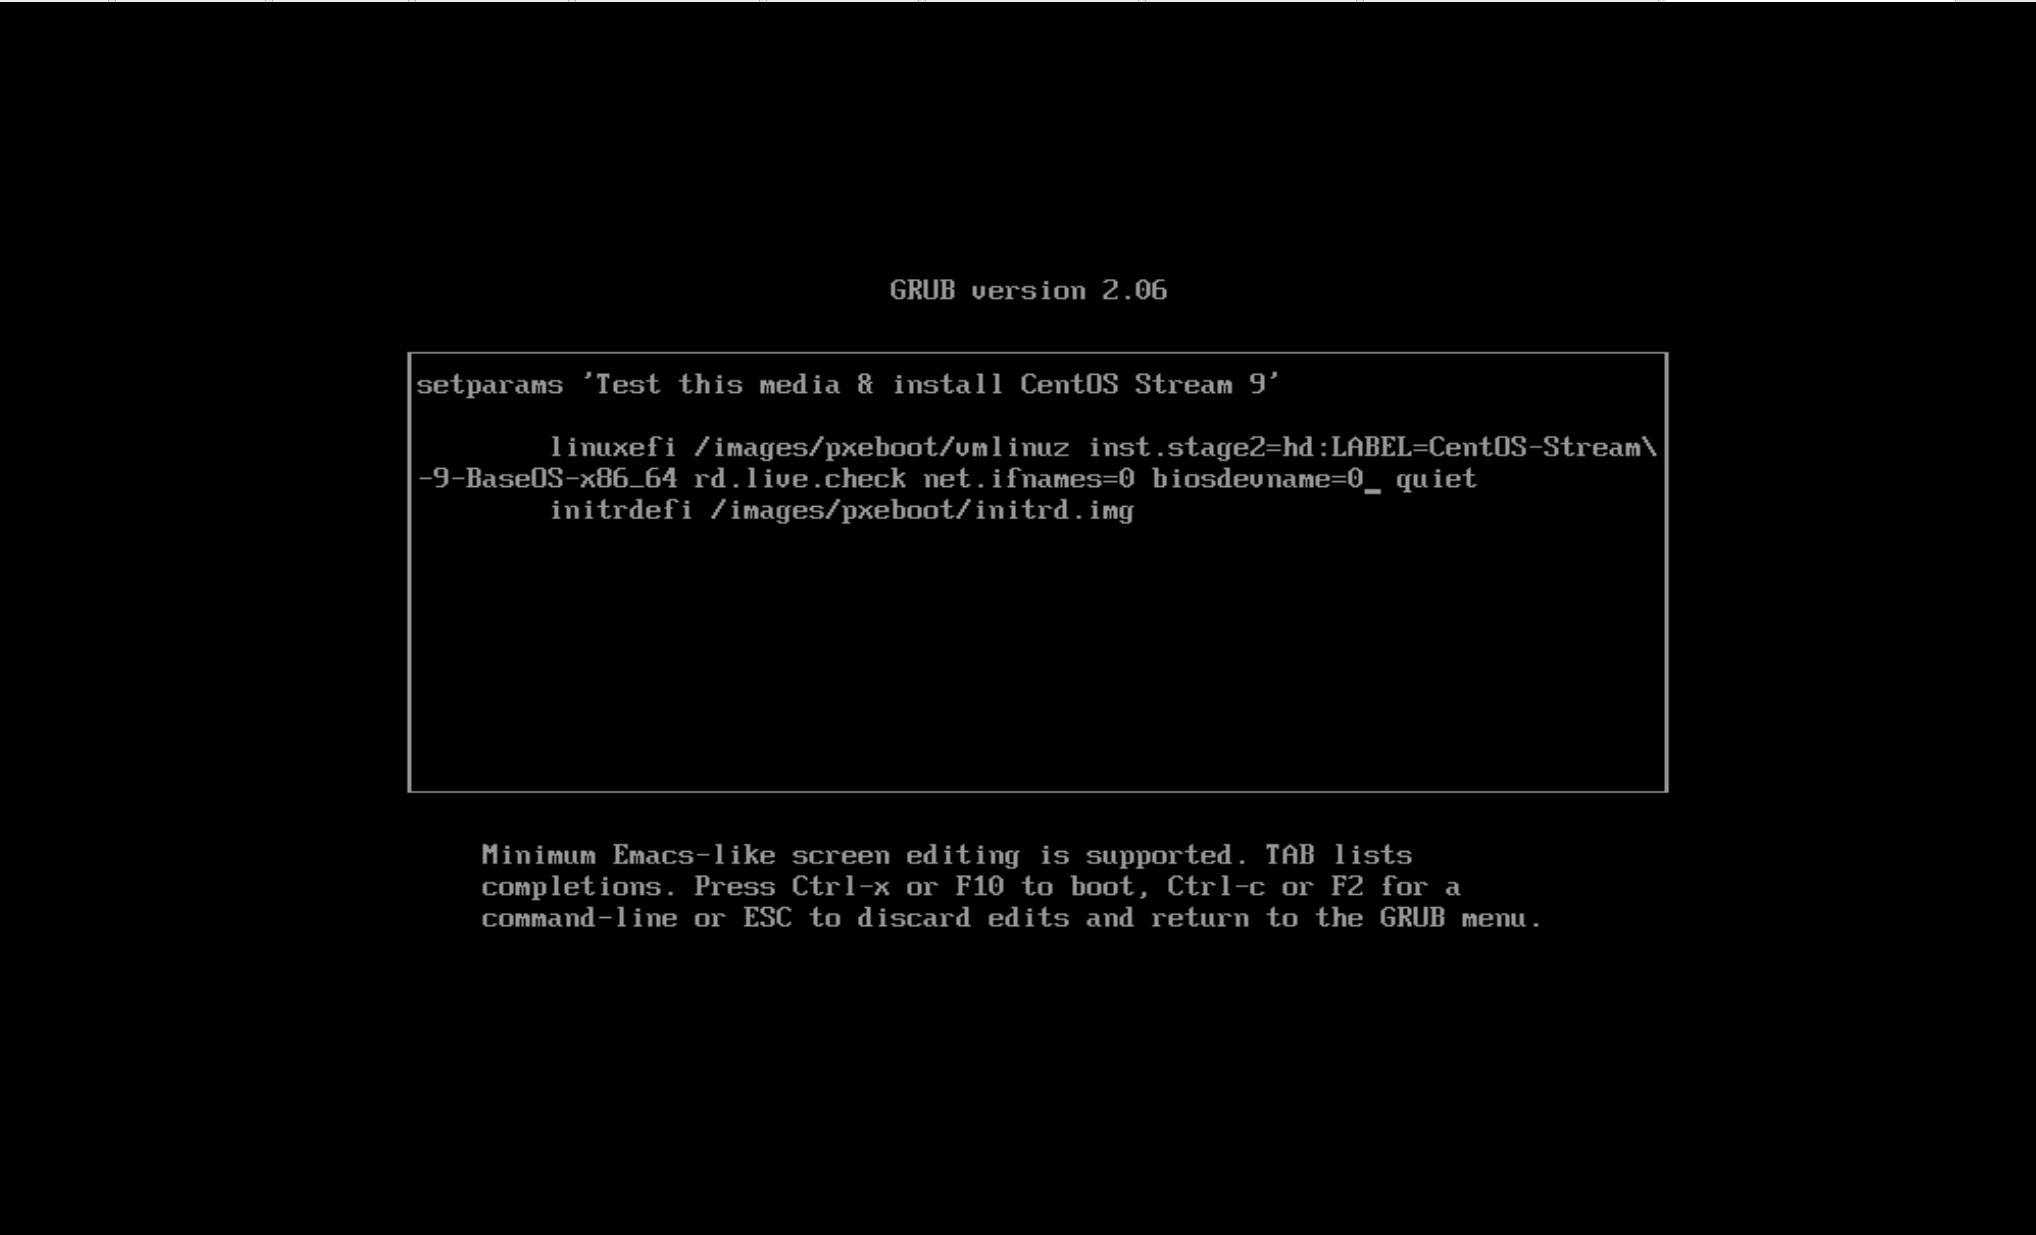
为了使网卡名字为eth0和eth1,安装页面按e,quiet前面加上net.ifnames=0 biosdevname=0,按ctrl+x进入系统,安装页面配置网卡信息
- 安装界面中的参数是临时生效的
通过安装界面添加net.ifnames=0 biosdevname=0仅对当次安装过程有效。安装程序不会自动将这些参数写入新系统的 GRUB 配置中。 - 系统重启后依赖 GRUB 配置
新安装的系统首次启动时,会使用默认的 GRUB 参数(不包含您临时添加的net.ifnames=0 biosdevname=0),因此网卡名称会变回默认的可预测命名规则(如ens33)。
目录
Toggle解决方案
若需永久保留 eth0 传统命名,必须在新系统中手动完成以下步骤:
1. 修改 GRUB 配置文件
sudo vi /etc/default/grub在 GRUB_CMDLINE_LINUX 行追加参数:
GRUB_CMDLINE_LINUX="... net.ifnames=0 biosdevname=0"2. 更新 GRUB 并重启
# 对于 UEFI 系统
sudo grub2-mkconfig -o /boot/efi/EFI/centos/grub.cfg
grub2-mkconfig -o /boot/grub2/grub.cfg   #上面那行运行之后提示这行
# 对于 Legacy BIOS 系统
sudo grub2-mkconfig -o /boot/grub2/grub.cfg

# 重启生效
sudo reboot
3. 验证网卡名称
重启后执行:
ip link show确认网卡名称是否为 eth0、eth1 等。
配置yum源
epel源:wget https://mirrors.aliyun.com/epel/epel-release-latest-9.noarch.rpm
yum install *.rpm
CentOS-Stream-9 CentOS9 配置国内yum源-阿里云源_centos stream 9命令更换阿里源-CSDN博客
网卡配置文件
[root@centos9-muban system-connections]# cat eth0.nmconnection
[connection]
id=eth0
uuid=62614e5a-50b5-3a68-a95d-e21232e16226
type=ethernet
autoconnect-priority=-999
interface-name=eth0
timestamp=1743122900
[ethernet]
[ipv4]
address1=10.0.0.110/24
dns=223.5.5.5;223.6.6.6;
gateway=10.0.0.2
method=manual
[ipv6]
addr-gen-mode=eui64
method=auto
[proxy]
[root@centos9-muban system-connections]# cat eth1.nmconnection
[connection]
id=eth1
uuid=186473d8-4a92-37a4-b960-41eef80a1685
type=ethernet
autoconnect-priority=-999
interface-name=eth1
[ethernet]
[ipv4]
address1=192.168.1.110/24
dns=223.5.5.5;223.6.6.6;
gateway=192.168.1.2
method=manual
[ipv6]
addr-gen-mode=eui64
method=auto
[proxy]
yum安装一些软件
yum安装常用工具
yum install -y lrzsz sysstat iotop iftop htop telnet bc httpd-tools nethogs expect
#测试epel源
yum install -y cowsay sl
ssh优化
优化ssh连接速度
vim /etc/ssh/sshd_config
UseDNS no#关闭ip反向解析为域名
GSSAPIAuthentication no#关闭GSS认证
systemctl restart sshd
chrony时间同步服务
时间同步
#修改时区(如果不对)
timedatectl status #查看时区 time zone部分
timedatectl set-timezone Asia/Shanghai #如果时区不对再修改.
#配置定时时间同步.
yum -y install chrony
[root@node1 ~]# vim /etc/chrony.conf
server ntp1.aliyun.com iburst
[root@node1 ~]# systemctl restart chronyd
[root@node1 ~]# systemctl enable chronyd
修改PS1/vimrc
修改命令行颜色,显示绝对路径(oh-my-zsh)
export PS1='[\[\e[34;1m\]\u@\[\e[0m\]\[\e[32;1m\]\H\[\e[0m\]\[\e[31;1m\] \w\[\e[0m\]]\$ ‘
写入/etc/profile或者~/.bashrc
source /etc/profile
追加到/etc/vimrc
#写脚本自动加作者信息
set ignorecase
autocmd BufNewFile *.py,*.cc,*.sh,*.java,*.bash exec “:call SetTitle( )”
func SetTitle( )
if expand(“%:e”) =~ ‘sh\|bash’
call setline(1, “#!/bin/bash” )
call setline(2, “##########################################”)
call setline(3, “# File Name:” .expand(“%”))
call setline(4, “# Version:V1.0”)
call setline(5, “# Author:zhangpeng”)
call setline(6, “# 0rganization:linuxjk.cn” )
call setline(7, “# Desc:”)
call setline(8, “###########################################”)
endif
endfunc
修改模板机主机名
hostnamectl set-hostname muban
hosts解析(方便使用主机名进行互相访问)
cat <</etc/hosts <<EOF
192.168.1.5 lb01
192.168.1.6 lb02
192.168.1.7 web01
192.168.1.8 web02
192.168.1.9 web03
192.168.1.10 web04
192.168.1.31 nfs01
192.168.1.41 backup
192.168.1.51 db01
192.168.1.61 m01
EOF
一键修改主机名和ip地址的脚本
脚本用法
sh /server/scripts/change.sh 主机名 192.168.1.15
#此处输入10.0.0.15会把eth1的ip也改成10.0.0.15
#!/bin/bash
#author: lidao996
#desc: change ip and hostname
#version: v7.0
if [ $# -ne 2 ]; then
echo “Usage: $0 <hostname> <eth1_ip>”
exit 1
fi
# 获取eth0和eth1当前完整IP(带掩码)
eth0_ip=$(nmcli -g IP4.ADDRESS con show eth0 | cut -d/ -f1)
eth1_ip=$(nmcli -g IP4.ADDRESS con show eth1 | cut -d/ -f1)
# 新的eth1 IP(完整地址)
new_eth1_ip=$2
# 修改eth0配置(保留原网段,只修改最后一段)
new_eth0_ip=$(echo $eth0_ip | sed “s/\.\([0-9]\+\)$/.${new_eth1_ip##*.}/”)
nmcli con mod eth0 ipv4.addresses “${new_eth0_ip}/24”
# 修改eth1配置
nmcli con mod eth1 ipv4.addresses “${new_eth1_ip}/24”
# 重启网络
nmcli con down eth0 && nmcli con up eth0
nmcli con down eth1 && nmcli con up eth1
# 修改主机名
hostnamectl set-hostname “$1”